
I don't know if this has been done before, but quite probably, however this one came right out of my head - I banned myself from Googling a pattern as I wanted to see how I went with my experimenting.
You will need scraps of yellow and white yarn. I prefer the cotton yarn for these as it defines the stitched beautifully. I used Rico Essentials Cotton DK in Banana and White. I used a 4mm hook.

This tutorial is written in UK Crochet Terms.
So, start with yellow and a magic ring- this is simply a wrap of yarn around your fingers, and catch your first stitch into it. It can be a little be tricky to master, but it means you can close that little hole up very close which looks a lot neater.


- DC into the magic ring 12 times.

- Pull the tail tight so the ring closes up.

- Slip Stitch (SS) into the first DC to close.

- Working on the INNER LOOPS only (see where my hook is?)

- Attach white and Chain (CH) 9.

- SS into the next INNER LOOP

- Repeat all the way round.

- CH 9, turn your work over and now you will be working into the OUTER LOOPS (see them?)

- Work as you worked the front, pulling your yarn through the last stitch to finish.

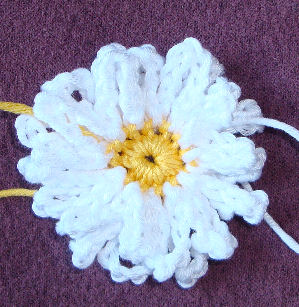
- OK, it looks a little scraggy now so spread out your petals.

- Work in the ends, leaving one long white one to use to sew your daisy onto whatever you might be sewing it on to and Voilà!
- Make more.

No comments:
Post a Comment
I would love to hear from you, questions, comments and salutations all welcome.